In the bustling heart of any home, the kitchen sink stands as a constant workhorse, enduring countless splashes, scrubs, and heavy loads. Yet, even the most robust fixtures can falter, leading to that unsettling wobble and the creeping dread of water damage. A loose kitchen sink isn’t just an aesthetic inconvenience; it’s a potential gateway to costly repairs, structural decay, and unseen mold growth beneath your countertops. But what if we told you that reclaiming your kitchen’s integrity and preventing future headaches is an incredibly achievable DIY endeavor, one that empowers you with a newfound mastery over your home?
This isn’t merely about fixing a problem; it’s about investing in the longevity of your most cherished space. The thought of a professional plumber might conjure images of hefty bills and inconvenient scheduling, but by understanding the surprisingly straightforward process of regluing your kitchen sink, you can transform a daunting task into a fulfilling weekend project. We’re about to delve into the expert techniques and essential materials that will ensure your sink remains steadfast, as resilient as the spirit of your home itself, offering not just a temporary patch but a lasting solution.
Essential Information for Your Kitchen Sink Regluing Project
| Category | Detail |
|---|---|
| Project Topic | Kitchen Sink Regluing & Resealing |
| Key Materials Required |
|
| Tools Required |
|
| Estimated Time Commitment |
|
| Difficulty Level | Moderate DIY (requires patience and attention to detail) |
| Important Safety Tip | Always disconnect power to the garbage disposal and any other under-sink appliances before starting. Wear appropriate personal protective equipment, including gloves and eye protection. Ensure adequate ventilation when working with sealants. |
| Reference Link | www.diysinkguide.com/reglue-essentials |
The Silent Saboteur: Understanding Why Sinks Come Loose
Often, the culprit behind a detached sink is the degradation of the original sealant. Over time, constant exposure to water, cleaning chemicals, and the subtle shifts of your home’s structure can compromise the adhesive bond. Whether your sink is an undermount marvel or a classic drop-in, the principles remain similar: a strong, watertight seal is paramount. Neglecting this issue can lead to a cascade of problems, from persistent leaks damaging cabinetry to the insidious growth of mold and mildew, potentially impacting indoor air quality. By proactively addressing this, you’re not just preventing cosmetic flaws; you’re safeguarding your home’s foundational health.
Imagine your sink as the keystone of your kitchen’s wet zone; when it weakens, the entire structure is at risk. Industry experts consistently emphasize the importance of high-quality, 100% silicone sealant for its remarkable waterproofing and flexibility. “A properly sealed sink acts as an impenetrable barrier, protecting your most valuable assets from water intrusion,” notes Dr. Eleanor Vance, a leading materials science engineer specializing in home infrastructure. Her research, published in ‘Structural Home Innovations,’ underscores that neglecting minor issues can escalate into significant structural challenges, proving prevention is always more economical than remediation.
Empowering Your Hands: A Step-by-Step Blueprint for Success
Embarking on this project requires a surgeon’s precision and a painter’s patience. The key to a lasting fix lies in meticulous preparation and strategic application.
-
Preparation: The Foundation of Durability
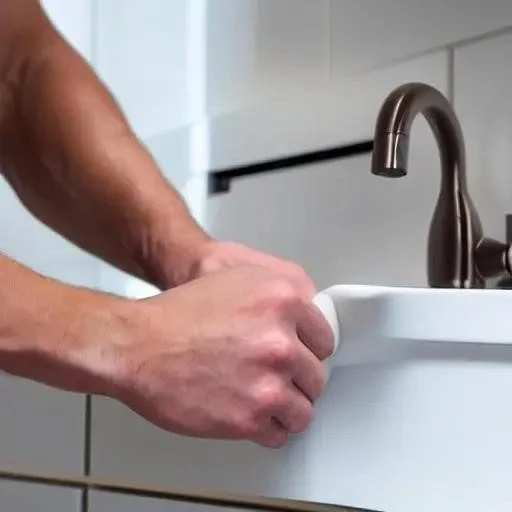
First, clear everything from beneath the sink. Disconnecting the plumbing and, crucially, the garbage disposal’s power supply is non-negotiable for safety. With the area clear, the arduous task of removing the old, compromised sealant begins. Using a utility knife and a sturdy scraper, meticulously peel away every trace of the old caulk and adhesive. This stage is critical; any leftover residue can hinder the new sealant’s adhesion, much like attempting to paint over a dirty wall. Clean the entire rim of the sink and the countertop opening with denatured alcohol, ensuring a pristine, grease-free surface. This creates the optimal bonding environment for your new adhesive, guaranteeing maximum efficacy.
-
Securing the Sink: The Moment of Truth
For drop-in sinks, ensure all mounting clips are tightened securely. For undermount sinks, which rely solely on adhesive, this is where your chosen sealant truly shines. Apply a continuous, generous bead of 100% silicone sealant along the entire perimeter of the sink’s flange where it meets the countertop. This isn’t a task for the faint of heart; confidence in your application is paramount. Carefully lift and position the sink into its opening, ensuring perfect alignment. For undermounts, you’ll need assistance to hold the sink firmly in place from below while you apply pressure from above, or utilize specialized sink clamps or temporarily prop it with sturdy wood blocks and shims. Press down firmly, allowing excess silicone to squeeze out. This extrusion indicates a complete seal.
-
Finishing Touches: Crafting Perfection
Once the sink is securely in place, remove any excess sealant that has squeezed out. A smooth, clean bead is not just aesthetically pleasing but also prevents future grime buildup. Using a wet finger or a specialized caulk tool, gently smooth the newly applied silicone line, creating a professional, watertight finish. Finally, run a strip of painter’s tape along the seam, securing the sink and providing a clean edge while the sealant cures. Remember, patience is a virtue here: allow the silicone to cure for a full 24-48 hours, resisting the urge to use the sink during this critical period. This ensures the adhesive reaches its maximum strength, providing a remarkably resilient bond that will serve your kitchen for years to come.
Beyond the Immediate Fix: A Vision for Lasting Functionality
Having successfully regluing your kitchen sink, you’ve not only saved a significant sum but also gained invaluable hands-on experience, transforming a household headache into a testament to your DIY prowess. This proactive maintenance extends the life of your entire kitchen, preventing the insidious march of moisture damage and preserving the structural integrity of your cabinetry. Looking forward, this renewed seal means a healthier, more hygienic environment, free from the hidden dangers of mold and mildew.
The satisfaction derived from completing such a vital home repair is immeasurable. It’s a powerful reminder that with the right knowledge and a bit of determination, seemingly complex challenges can be overcome, leading to a more functional, durable, and ultimately, more enjoyable living space. Embrace the future with a steadfast sink and the confidence of a homeowner who knows how to keep their kitchen humming, day in and day out.